The Terminal tab
A shell on the server, inside AirSCP. It uses the host’s connection, so there is no second login. Open as many shells as you like, each in a tab of its own. It knows files: right-click a file name in the output to show, download or edit it, drag it to Finder, and drop Finder files on it to upload them to the folder you are in. With bash and zsh it also knows your commands: how each one ended, how long it took and what it printed, and it keeps them in a history you can search.
Steps
- Connect to the host.
- Click Terminal above the files, or choose Host ▸ Terminal Tab (⌃⌘T).
- Type as in any terminal. Programs such as
less,vim,topandnanowork full screen.
The shell starts in the folder the Files tab’s server pane shows. On a Windows server it is the server’s own shell (cmd.exe or PowerShell), also in that folder.
Open more shells in tabs
Click + above the terminal, or choose Host ▸ New Terminal Tab (⇧⌘T). The new shell starts in the folder of the one you were looking at (when AirSCP can’t tell, in the Files tab’s folder), on the same connection: no second login.
- Click a tab to show its shell. Host ▸ Show Previous Terminal Tab (⇧⌘[) and Show Next Terminal Tab (⇧⌘]) go through them.
- Each tab is named after its shell’s folder, or the title the shell or a program gives it.
- To close the tab you see, click × or choose Host ▸ Close Terminal Tab. If a command is still running in it, AirSCP asks first (it can tell with bash and zsh, and for full-screen programs). The last tab stays: type
exitto end its shell.
See how each command ended
With bash and zsh, each command you run gets a small label at the right of its line when it ends:
- ✓ 0.4 s: it worked, and took 0.4 seconds.
- ✗ exit 1 · 2.1 s, in red: it failed, with exit status 1. A red bar runs down the left side of its output.
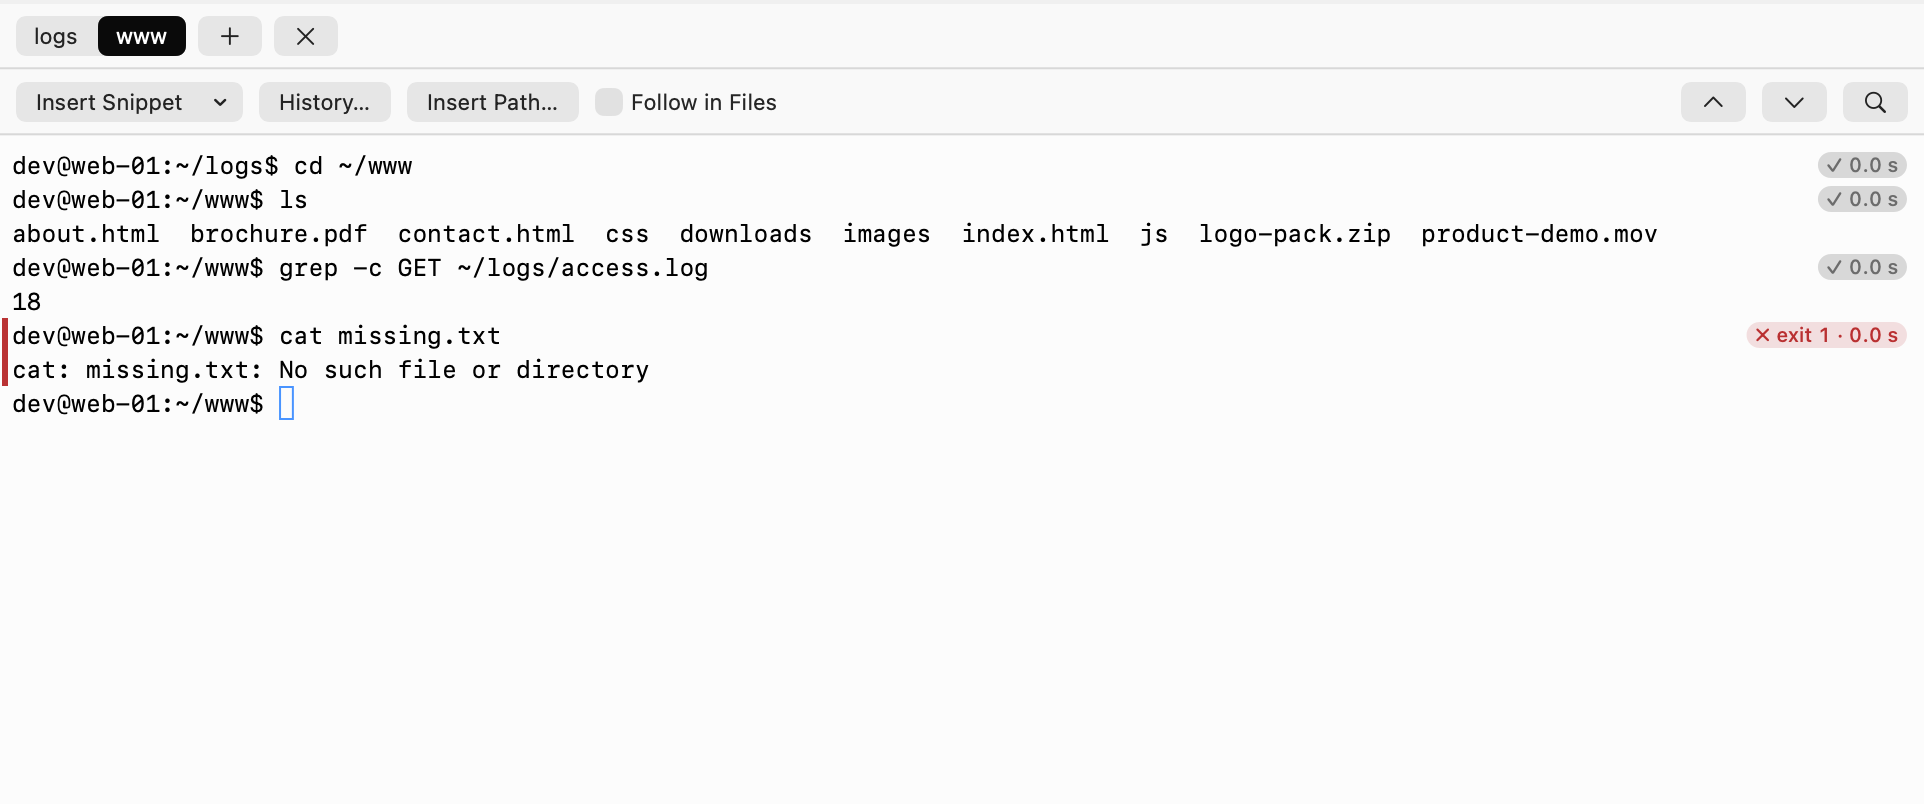
Right-click a command or its output:
- Copy Output: copies what the command printed.
- Copy Command: copies the command line. A command typed over several lines comes as you typed it, without the shell’s
>prompts. - Run Again: types the command at the prompt and runs it. It waits until the prompt is empty. A command of several lines isn’t typed again: use Copy Command, check it, and paste it.
Jump between commands with ⌘↑ and ⌘↓, or with the arrow buttons at the top of the tab. The command you jump to is tinted. ⌘↓ after the last one goes back to the bottom.
Find text
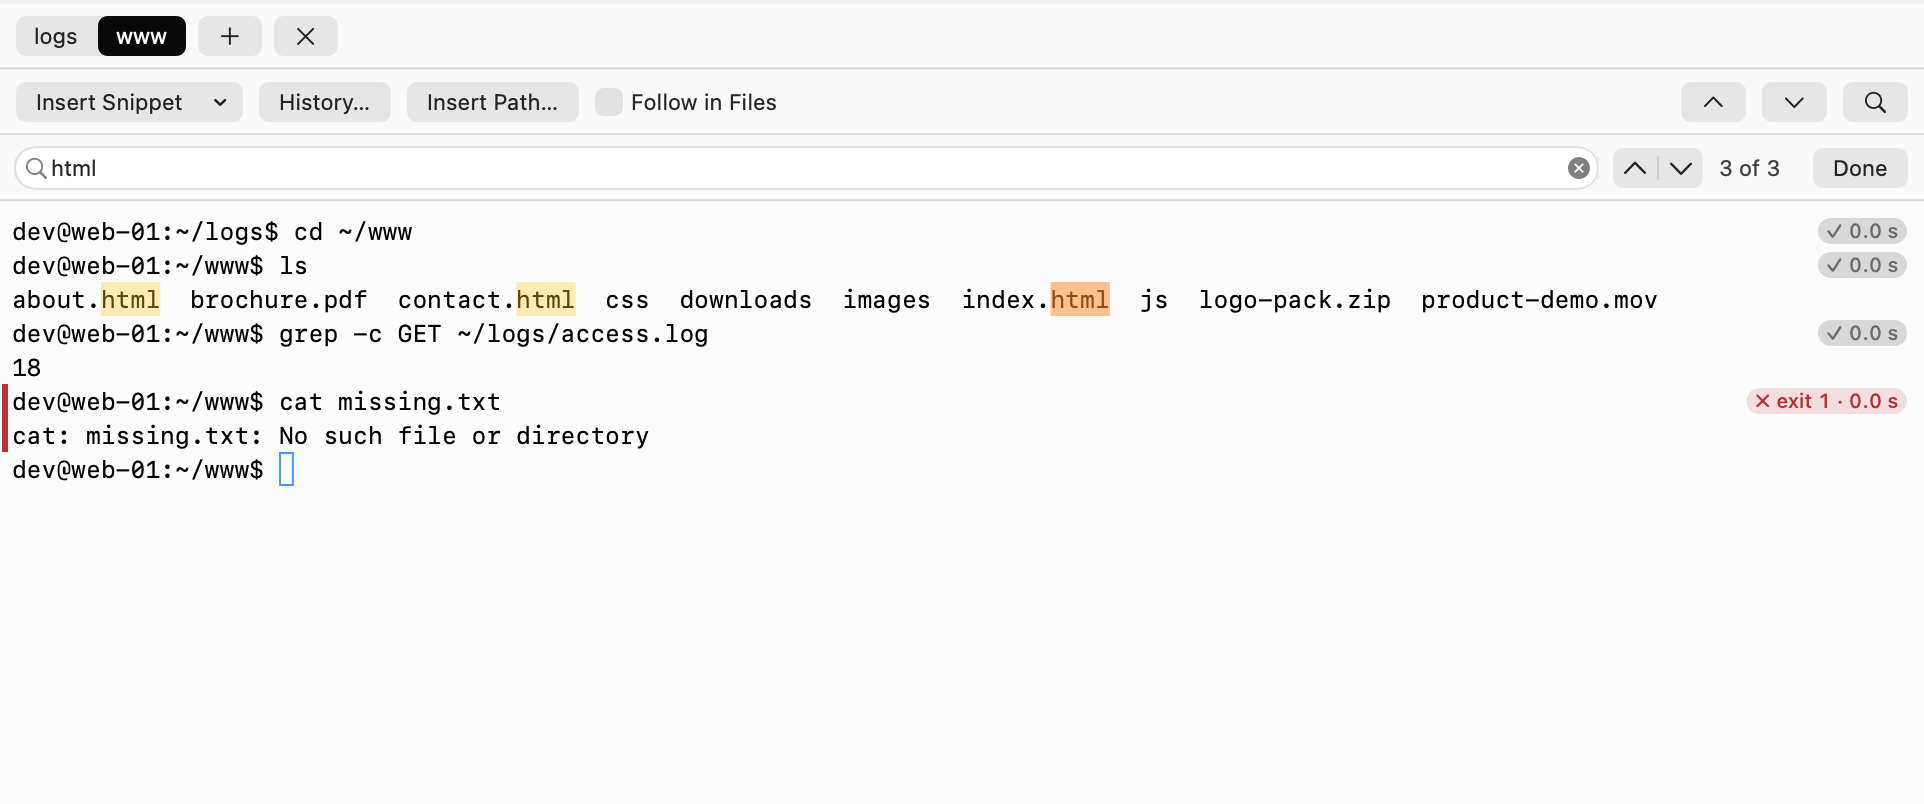
Press ⌘F (or click the magnifying glass) and type. Every match in the output and the scrollback is highlighted, and the count shows how many there are. Return goes to the match above, ⇧Return to the one below. Done (or Esc) closes the find bar.
Keep the Files tab in the same folder
Tick Follow in Files at the top of the tab. The shell goes to the folder the Files tab’s server pane shows (AirSCP types cd at its empty prompt); the server pane stays where it is. After that, each time you cd to another folder, the server pane goes there too. It goes only where the shell itself says it is: a folder that a program prints can’t move it. And each time you open a folder in the server pane, AirSCP types cd with that folder at the shell’s empty prompt, so the shell goes there too. While a command runs, AirSCP types nothing.
Without Follow in Files, turn on Open Terminal Here and Run in Terminal in the Terminal tab in AirSCP ▸ Settings…. Then a server folder’s Open Terminal Here (⌥⌘T) goes to this tab. If the shell is at an empty prompt, AirSCP types cd with the folder for you. If it is busy, or isn’t bash or zsh (AirSCP can’t tell when such a shell waits), AirSCP opens a new tab in that folder instead, and never types into the busy one.
Run in Terminal (in Run Command, a snippet’s option, File ▸ Run…, the Monitor’s Kill with sudo) works the same way with this setting: the command is typed and run at an empty prompt, or runs in a new tab.
The App Store version always works this way, without the setting.
Insert a snippet
Click Insert Snippet at the top of the tab (or right-click ▸ Insert Snippet) and choose one. AirSCP types the command at the prompt but doesn’t run it: read it, change it if you need to, then press Return. Placeholders such as {file} are typed as they are: replace them first. See Save commands as snippets.
Go back to an earlier command
Click History… above the terminal (or right-click ▸ History…). It lists the commands you ran on this host, newest first, from every tab and every earlier shell. Type to filter the list, use ↑ and ↓, then press Return (or click Insert): AirSCP types the command at the prompt but doesn’t run it. Read it, change it if you need to, then press Return.
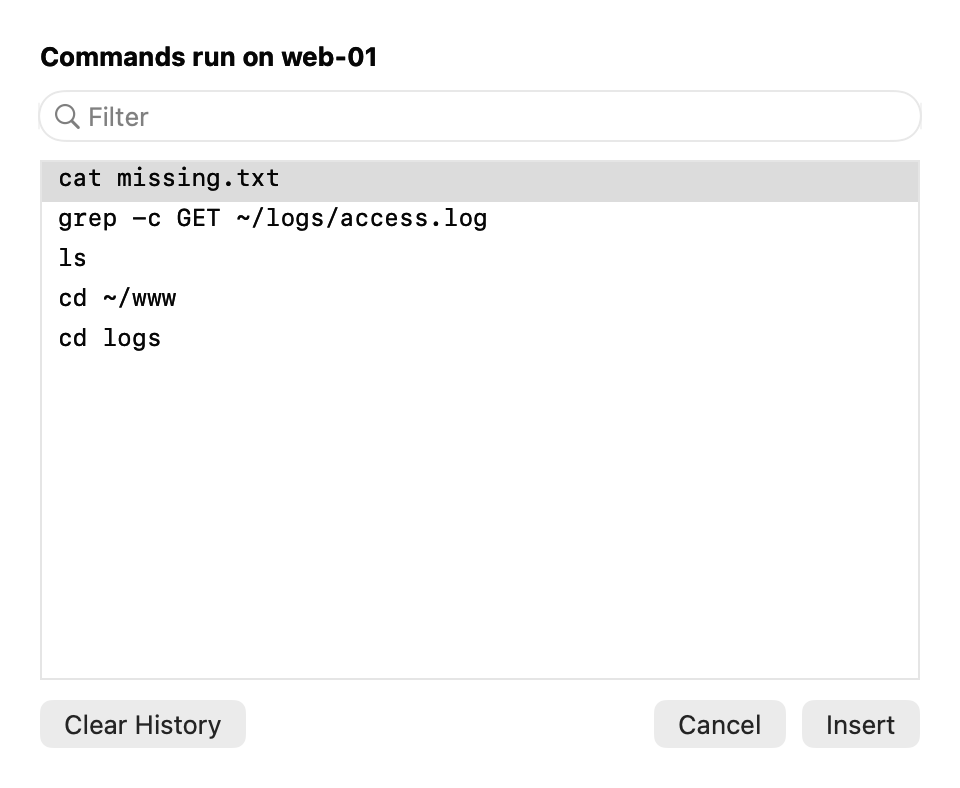
- Commands are kept when they end, with bash and zsh. A command you type with a space in front is not kept, as the shells themselves do.
- AirSCP keeps the last 1,000 commands of each host, each one once, on this Mac only. Clear History forgets them. The server’s own shell history stays as it is.
Insert a path from the server
Press ⌥⇥ (or click Insert Path…, or right-click ▸ Insert Path…). AirSCP lists the folder of the path you are typing: cat /var/log/sy lists /var/log, cat site/ lists site in the shell’s folder, and nothing typed lists the shell’s folder. Type to filter, choose one, and press Return: AirSCP types its name in place of what you typed, with quotes if it has spaces or other special characters. A folder comes with a /, so you can go on.
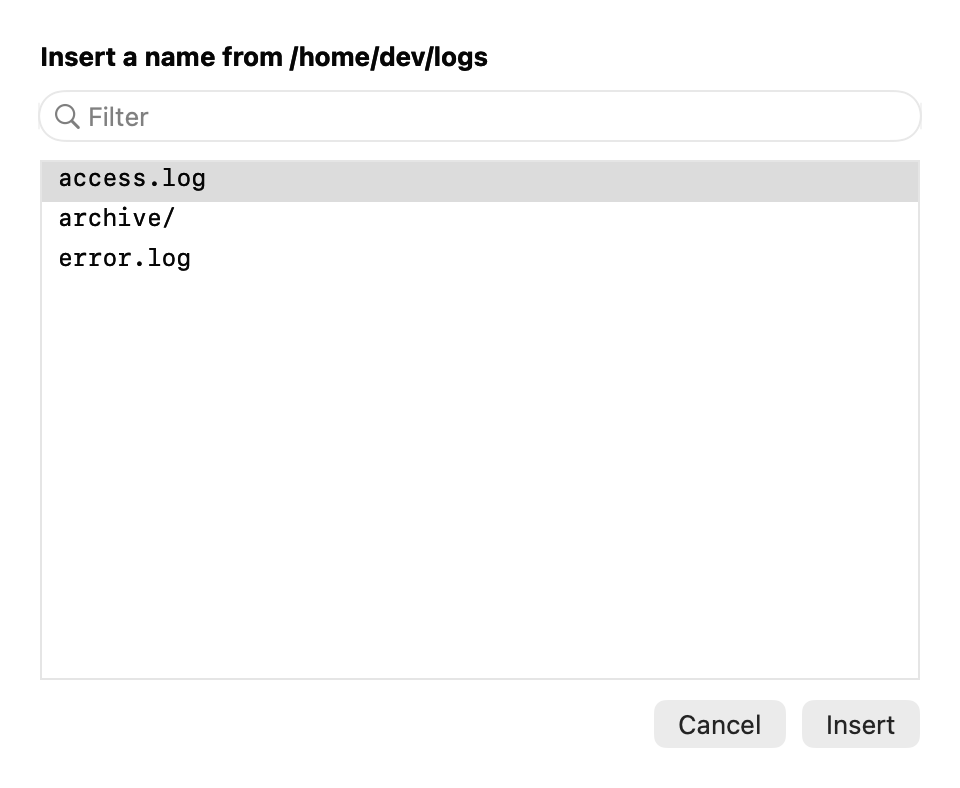
This helps with long names, and with shells that can’t complete names themselves. The list comes from the same listing as the Files tab.
Work with files from the output
Right-click a file or folder name that a command printed (ls, find, grep -l, a compiler’s file.c:12):
- Show in Files: the Files tab shows it in the server’s pane.
- Download: copies it to the Mac folder of the Files tab, through the transfer queue.
- Edit in AirSCP: opens it in AirSCP’s editor. Save puts it back on the server.
- Get Info: its size, owner, permissions and dates.
- Copy Path: its full path on the server.
A name without a path is taken from the folder the shell is in.
Drag a file to Finder
Select a file or folder name in the output (double-click it), then drag the selection to a Finder window or the desktop. AirSCP downloads it there through the transfer queue, as when you drag from the Files tab.
Upload by dropping files
Drag files from Finder onto the terminal. AirSCP uploads them to the shell’s folder through the transfer queue, and types their names at the prompt.
How it knows your commands
When the server’s shell is bash or zsh, AirSCP starts it with a few extra lines that mark each prompt, each command and its end. Your own startup files (.bash_profile, .profile, .zshrc and the others) still run as before, and nothing on the server is changed: the extra lines are in a temporary file that the shell deletes as soon as it starts. Other shells (BusyBox sh on small servers, fish, csh) work as before, without labels, Run Again, Follow in Files or the jumps.
With bash older than 4.4, commands show how they ended but not how long they took, and Run Again is off: use Copy Command and paste it.
Completing names with Tab and going back through earlier commands with ↑ come from the server’s own shell, as in any terminal. Insert Path… and History… are AirSCP’s, and work in every shell.
Tips
- Select text by dragging (only the text you drag over is highlighted); ⌘C copies it and ⌘V pastes. A double-click selects a word.
- Scroll up to see earlier output. Clear Scrollback (right-click) forgets it.
- ⌃C, ⌃D and the other Ctrl keys go to the shell. ⌘ shortcuts stay AirSCP’s.
- When the shell ends (you typed
exit, or the connection dropped), press Return in its tab for a new one. - Host ▸ Open Terminal (⌘T) still opens Terminal or iTerm instead. See Open a terminal.
If something goes wrong
- “Connect to the host to open a shell here”: the host isn’t connected. Choose Host ▸ Connect.
- “AirSCP can’t tell which folder the shell is in”: the server doesn’t show it (no
/procand nolsof). Use full paths, or drop files on the Files tab’s server pane instead. - No labels beside your commands: the shell isn’t bash or zsh, or your startup files replace the prompt hooks. Run
echo $SHELLto see which shell the server starts.